
Game Time!
Shooting People

Das Briefing - neue Studioaufnahmen für seine Internetseite und ein paar Portraits!
Read MoreA couple of weeks ago i had the great honour of accompanying Ann Karin and Boris on their wedding day!
Read MoreHi,
It's been a couple of weeks, and as i said in a previous post, i will be writing about my recent shoots with Theater Oberhausen, producing the imagery for their 2018/19 programme.
Well, here comes the first in that series.
The shoot for the theater's new programme involved photographing the permanent cast of the theater in various situations, performing 'other jobs' in the local area. We visited a hospital, funeral parlour, and a kiosk, to name just a few locations.
Most of the shoots were carried out at night, in order to take a look in to what people are doing while the rest of us sleep.

Midnight pizza
These shoots presented of course one major challenge; darkness. Something that can be overcome with knowing what you're doing, and a little trickery with lights here and there.
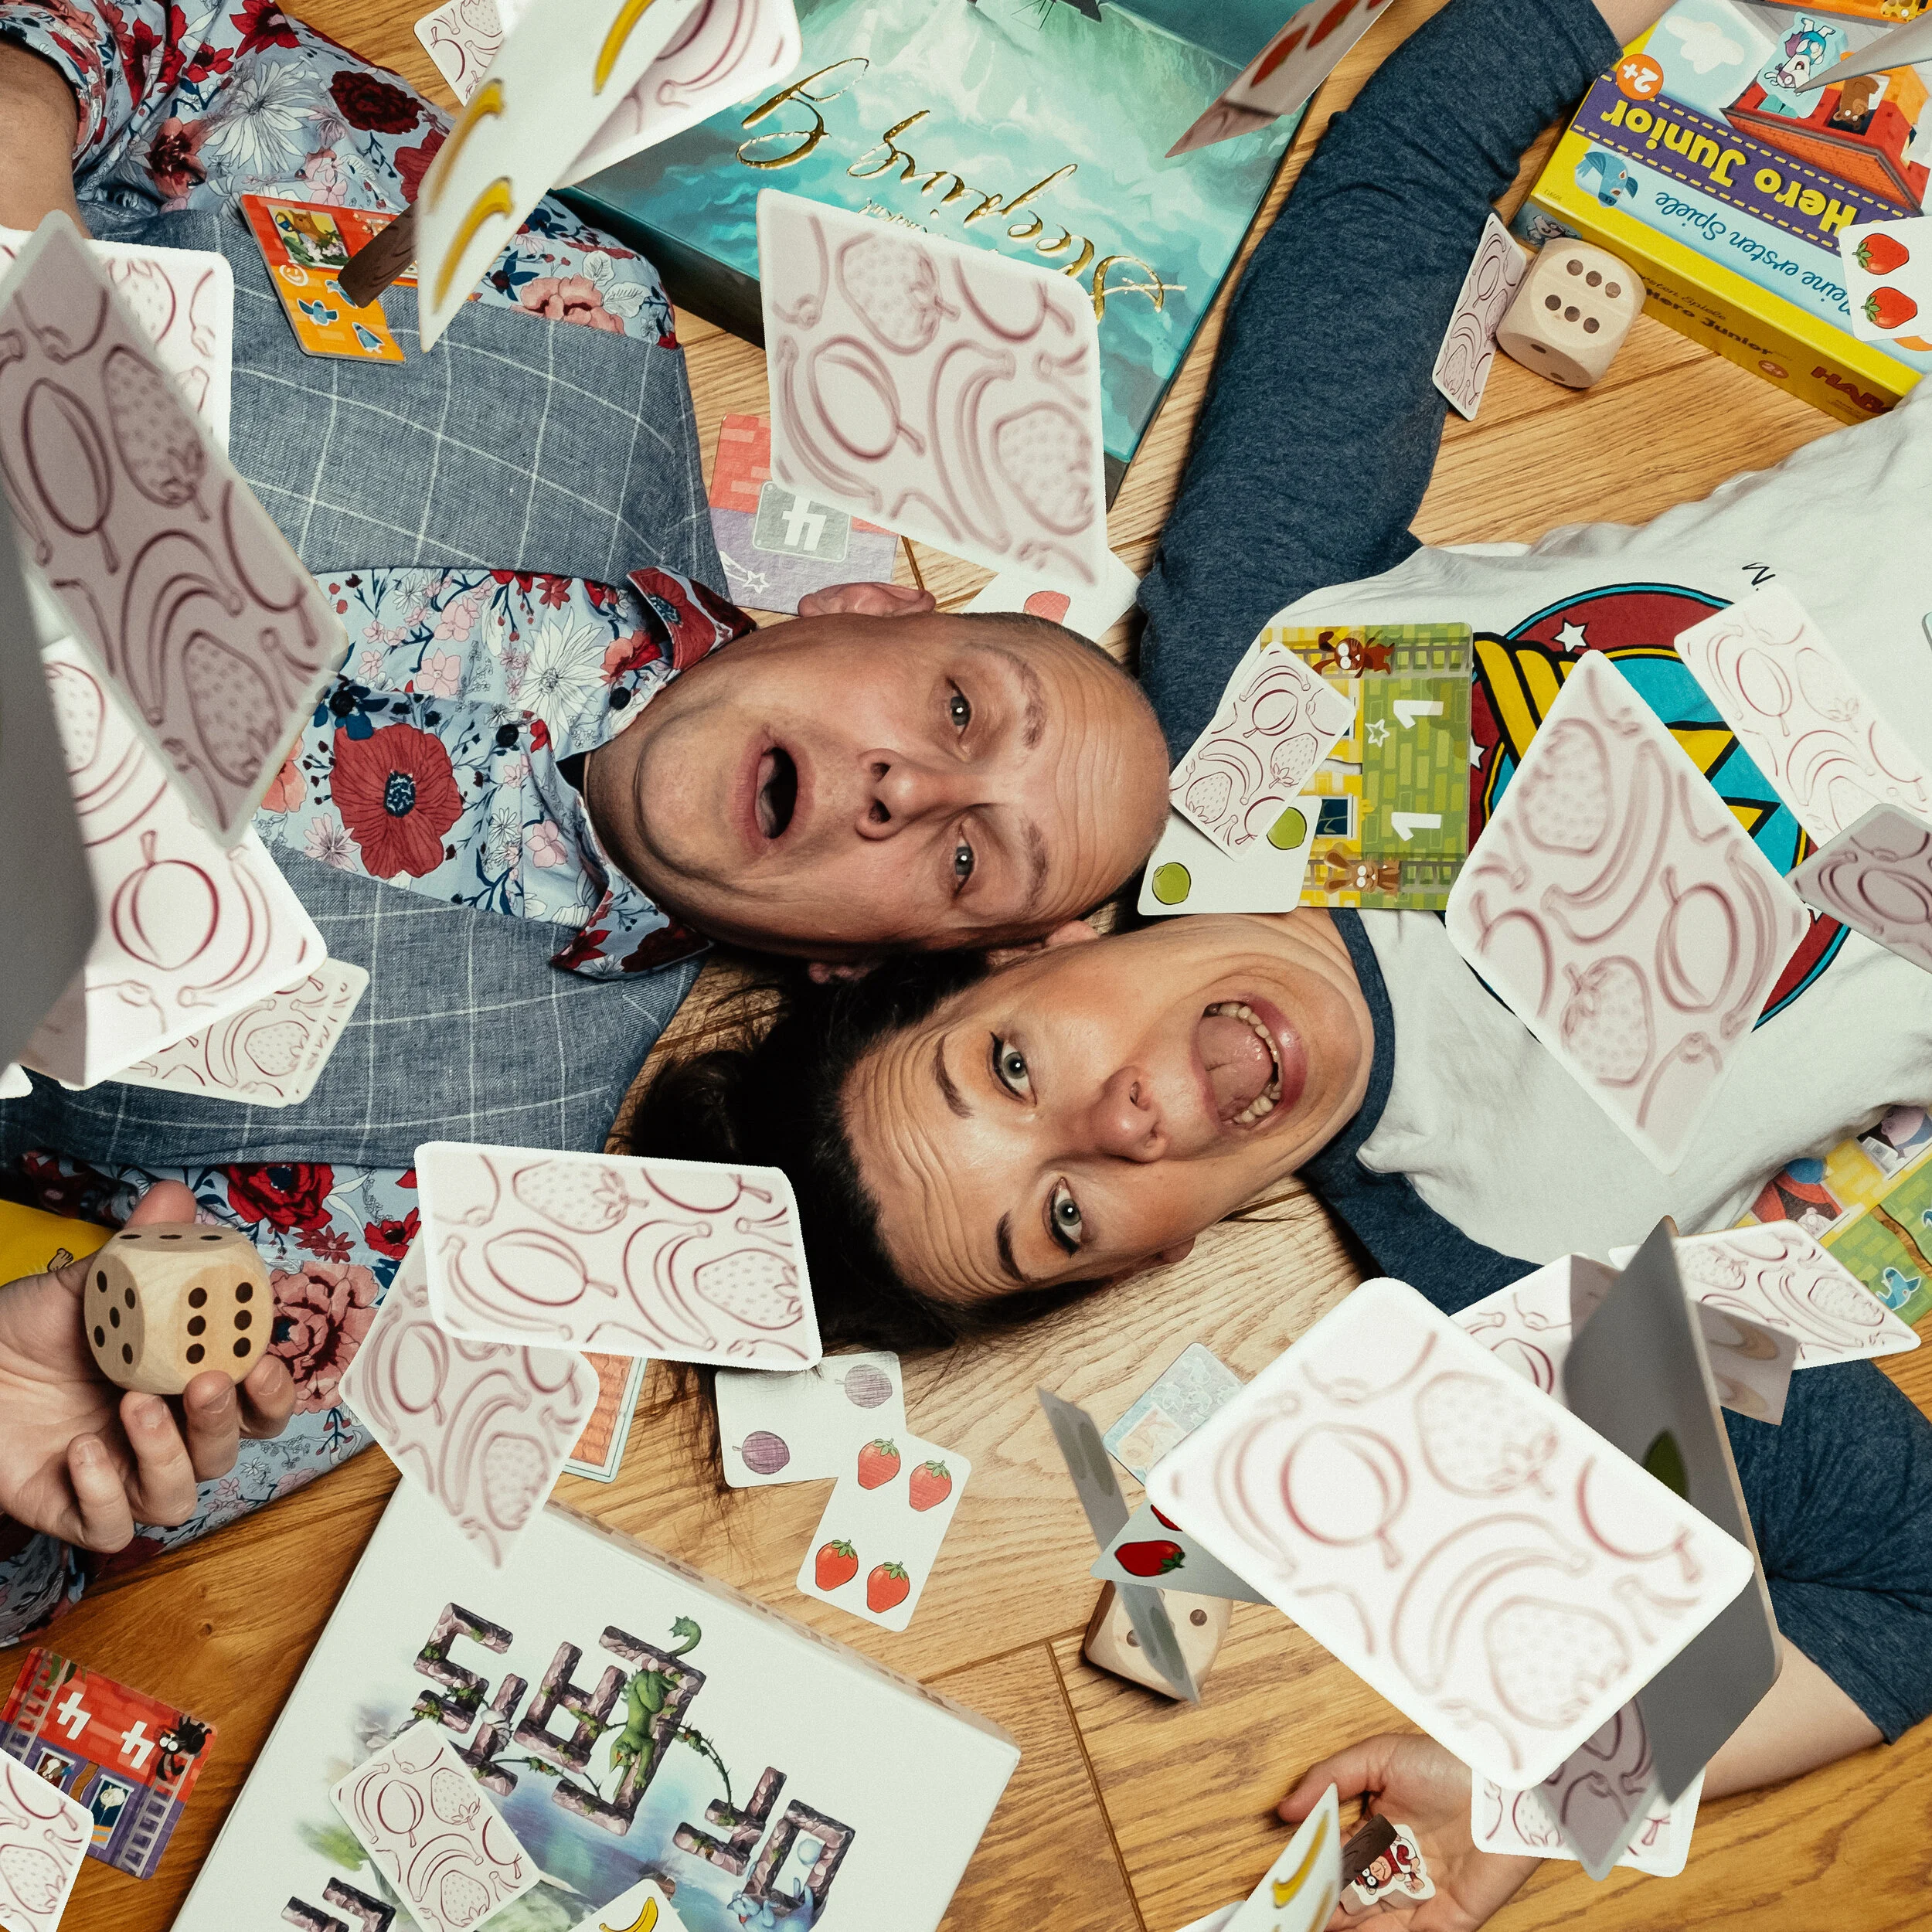
One of the most challenging shoots however was the team photo. All the men and women who work behind the scenes at the theater, who of course deserve their place in the programme, joined by some of the cast who were around on the day.
Photographing 50 plus people and making it look interesting isn't so easy.
Thankfully, Franca, who i mentioned in a previous post, was on hand with some ideas and some sharp organisational skills!!
The plan was: use the main stage in the theater, bring some props in, and get everyone to lie on the floor in some kind of organised way so it looked like they were doing their usual jobs - or somewhere close!
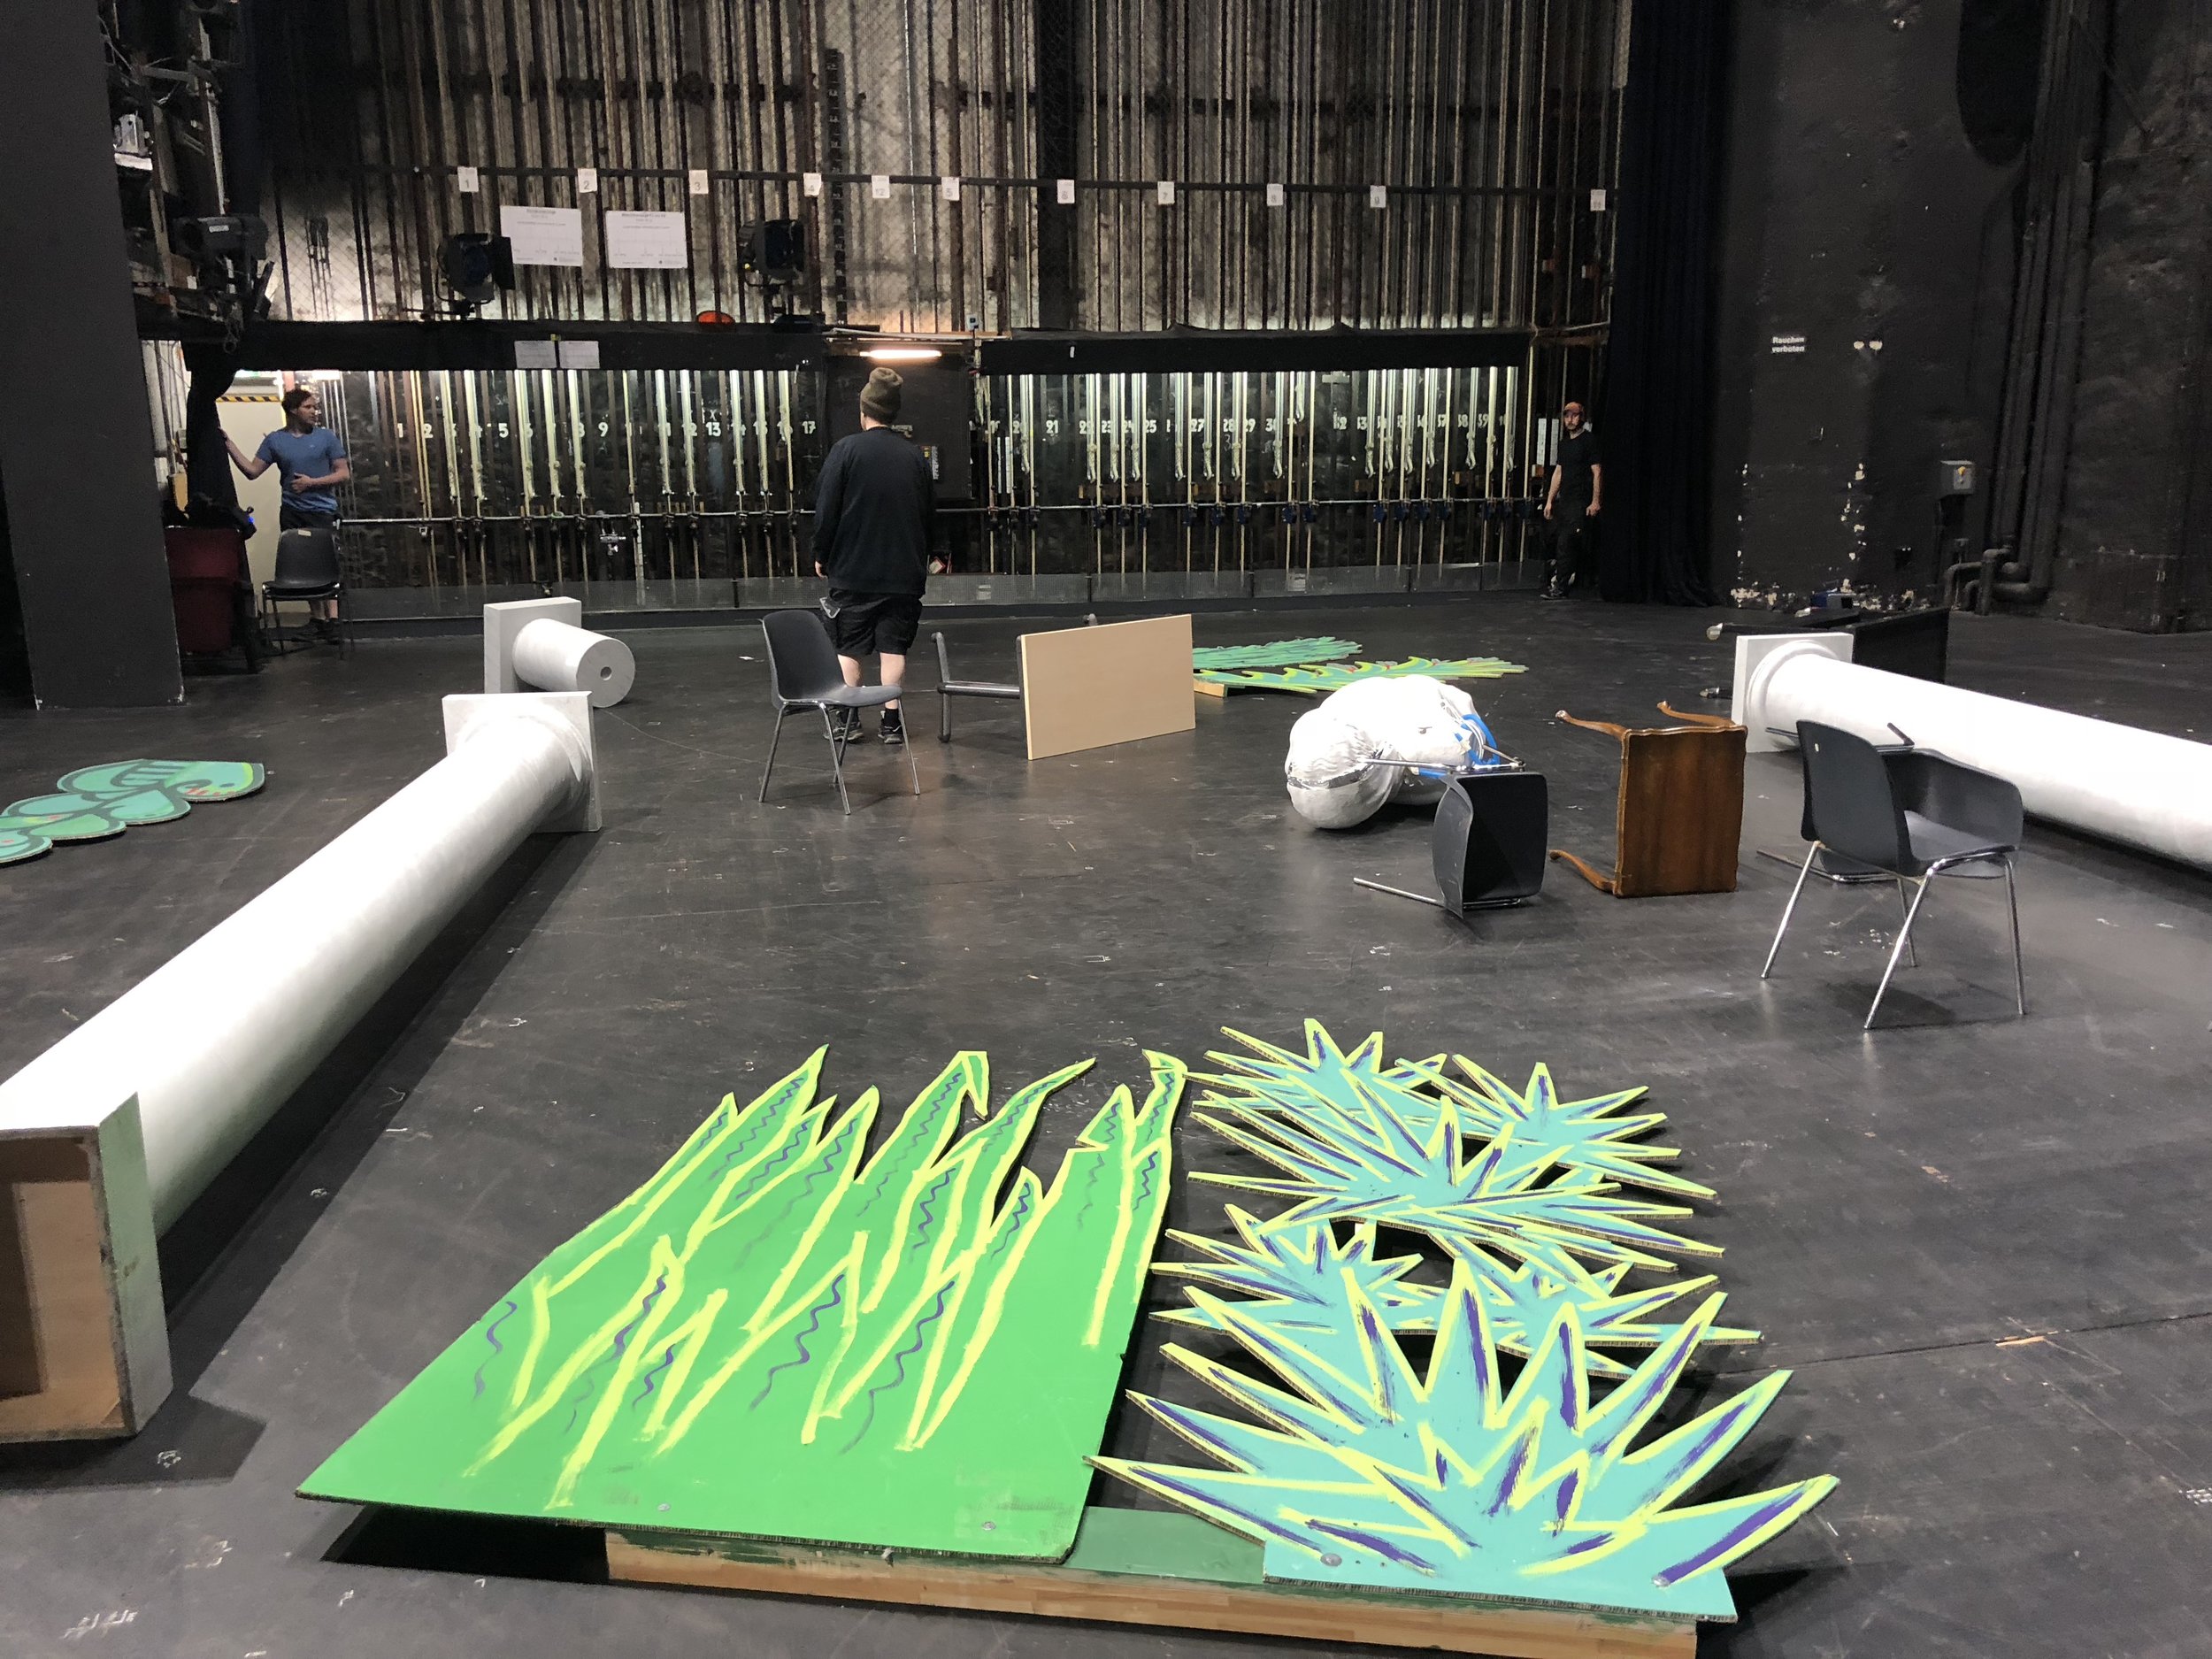
From a technical point of view, figuring out how to photograph the stage from directly above was a bit of a sticky point.
Sending the camera up with the lighting rig was the simplest option. Then firing the camera remotely.

Gaff tape and cable ties. A dream combo!
Instead of using cables to connect the camera to a computer to take the shot, i opted for using my reserve camera, a Canon 6D, and using it's wifi function to connect to my mac and take the shot. Easy right - wrong!
First, the proprietary software which Canon uses to tether the camera remotely is junk! The camera and computer can't see each other automatically like the camera can with Canons smartphone app. You need to first set up an ad-hoc network on the computer, then try and force the camera to see it.
When you are finally connected, the connection drops every few seconds. And you can't use more stable software like CaptureOne - or at least, i couldn't get it to work.
The dropped connection of course could be due to the distance between camera and computer, around 15 meters; but once i had moved myself, and the macbook up into the rafters nearer the camera, the problem continued.

I tried my best to get as close to the camera as i could. This made communicating with the stage difficult.
Franca meanwhile continued to coordinate things down on the stage, with me having to send a screenshot from the macbook over WhatsApp every few seconds. This was of course only possible while the connection to the camera was holding and i was able to see something.
Several test shots later, we were ready to go - and of course, the connection dropped again. Wi-Fi off, Wi-Fi on, close EOS utility, open EOS utility - you get the idea of what a struggle it was!!
We did however get there in the end, and managed to pull an image out with so many things to look at!

The image features on the inside cover of the new programme, and can be checked out online here!
There'll be more stories about the rest of the shoots coming in the coming weeks!
Until then... :)
Hey everybody!
So, after a bit of thought, planning, testing, and other things, I've decided to hit the road and bring my shoots to somewhere near you!

Next weekend, there's two opportunities for bands, artists, actors and business owners to freshen up their promotional material with some new images at a reduced price!
First up, on Saturday 16th June, i'll be heading to Essen to shoot business portraits. These sessions are aimed at entrepreneurs, self-employed persons, online influences even actors and those that simply wat to spruce up their social media accounts.
These Business Shoot sessions are the perfect way to get yourself in front of camera, in a relaxed atmosphere. Locations are free to choose from; from a leafy park, to your office or favourite coffee shop! You're in charge!

Sunday 17th June brings me back to my roots - music!
If you're in a band, or are a performer in the Cologne area, then this one is for you!
If you need new promo images for your bands website and social media feeds, then drop me a line!
Again, locations are you're choice, what ever fits your style!
Both shoots are accompanied with a chat before-hand to get the ideas out there and make a plan!
For more info, check out my facebook page. To book, drop me a mail to info@ape.photos - it'll be great to see you there!!
Ant
I've been pretty busy lately. Who hasn't I hear you say? Busy is good right?
A big chunk of my recent work has come from a new customer. A theater in Oberhausen. How this relationship started is very random - a real case of 'right place right time', but i won't go into that right now.
Part of the process of promoting a production is of course taking pictures of it. Not just of rehearsals, but also a preview photo. An image that the theater can put out into the world to whet the appetite of it's patrons.
Last week, my theater colleagues and I headed out to shoot a promo photo for an upcoming production.
The location had been found already. Some old workers houses, with street lanterns attached to the wall, to give the photo the feel of the period in which the production is set (WWII).
Problem was, arriving at the location, all of the houses with lamps attached had cars parked nose-to-tail in front of them. An actress in a 1930's costume, in front of a house from the last century with a new mercedes wouldn't really work!
We scouted the area and found a house with no cars, but no lamp!! Time to improvise!!
In the image below, you can see what i'm trying to do: balance the ambient light so that it's still visible a little, bringing in some soft light from across the road to light the subject but not cause to much shadow, and a flash from above mimicking a street lamp similar to the other houses. The next consideration here is keeping the aperture small enough to make the new street lamp look like a burst of light, and not a flash gun, while still achieving some kind of balanced exposure!

Balance the ambient, flash from front with as little shadow as possible, and a street lamp from above - easy right?
The final image below was a bit of a funny one to edit. It's pretty much as it was in camera, from an adjustment point of view not much has happened. Trying to decide what to do with our new street lamp was the problem!

Anna Polke
I added several vectors of street lamps in photoshop. I even borrowed some street lamps from other images i found on the web. Nothing looked right, or better or more realistic that what came out of the camera.
It almost looks like a street lamp. And the stand it's on is not really dissimilar to the ironwork of the actual lamps on the other houses.
To the untrained eye, thats looking at the subject, it looks fine.
To me and you, it's a flash gun on a stand being held above a guys head who's hiding behind the house :)
For more information, click here.

mmmmm... dampness
Well there it is! The Karma (Sutra). A new drone from GoPro, along with a new camera, the Hero5 were unvield to the public yesterday afternoon!
It flies, it folds, it looks awesome, and it may well have the guys over at DJI worrying!
Apeman is now officially looking for a review copy of this sucker!
Aerial photography is something that i've been wanting to get in to for a while. The problem is the cost of quality equipment is somewhat prohibitive. For what i shoot, concerts and cars from time to time, such a piece of kit would open up a whole new world and put me ahead of the competition! I need something like this in my life!
Gopro....if you're listening - i have the camera ready to roll for a review!! :)
Hey!
So, last week I talked about killing ambient light in order to create a low-key portrait. Well, this week, I've been having a play around with high-key light, again using just one speedlight!
When creating a low-key scenario with one strobe, the starting point is always the shutter speed. Simply, pump it up all the way to your cameras maximum flash sync speed. This is usually in the range from 1/200 - 1/250th of a second. This gives you your starting point to be able to create a dark image from a lit scene.
When creating a high-key lighting effect, the mission is to make your camera as sensitive to light as you can, while trying to maintain a correct exposure. Over-exposing slight isn't going to kill your image, but don't forget that simply over-exposing as much as you can to create the effect will result in a serious loss of detail in your final image, and something that is as good as un-savable in post!
In the image below, my set-up couldn't have been simpler! Usually two strobes as used in this method - one to blow out the background and one to light the subject. I used just the one flash, in room flooded with daylight.
So, in my shot, I used one light, set to 1/4 power, placed on a stand behind me and bounced off the wall and ceiling behind me. That was it! Having a white background is obviously a must. In this case I simply draped a white sheet over my sofa. Depending on the size of your room, or distance to subject, you may of course need to increase or decrease the output power of your light.
Set your ISO to something a little more sensitive, but nothing thats going to cause image degradation - I used ISO 400. As I was shooting a baby, that of course won't stay still, I couldn't shoot wide open. If I did, then I probably wouldn't have got a single sharp shot! f3.5 was used in this case to give me enough depth of field to allow for slight movement.
So - that's my base settings, then, It's just a case of bringing the shutter speed down enough to let the camera suck in plenty light!! My shot here was taken at 1/80 second at f3.5 ISO 400 with flash at 1/4 power and 24mm for a good spread of light. Some creasing in my background is still visible - so not completely blown out. This can be adjusted in Lightroom using an adjustment brush in the white, highlights or exposure channel. Easy! A word of warning though, be careful not to go to mad in Lightroom - you can end up with the image looking like the subject has been superimposed onto a white background - not good. I've left the slight shadow that was cast just to avoid this look.
I'll definitely be having a play with this set-up again soon! May next i'll try the trusted 2 light technique and report back!!
Kit used: Canon 7d, Tamron 17-50mm SP DI, Yongnuo YN-560III Flash with 560TX wireless trigger, Walimex pro lightstand, old bed sheet.

A couple of weeks back I wrote about having to shoot in low light. Not by choice either. Events and concerts are usually dark places. In the case of one concert I shot recently there was virtually no light whatsoever.
Now I want to write about deliberately creating a low light situation - or more so, killing the ambient light you have in order to create low light, or low key photographs. This type of shot is often used in portraiture, lifestyle and fashion photography.
Below are some examples of some shots i took during a shoot with a musician this week. These pictures were taken in a small living room (ca. 20 square meters), using one flash. Wait - flash? Shouldn't that mean bright, well lit pictures? Well, not always. The technique used here is known as killing the light, or killing the ambient light.
The method?
Well, don't worry about how bright the room is you're shooting in. Obviously, shooting outside in bright daylight or in a room flooded with midday sun isn't the best thing, but a light room won't derail things too seriously.
First, set your cameras shutter speed to the highest sync speed of your speed light - this is usually around 1/250th of a second. You may be able to go faster if you can use high speed sync. Next, select ISO 100 so as to make your cameras sensor as resistant to light as possible.
Finally, play with the aperture and get shooting. You basically want to end up underexposing your shot to the point that the picture is dark. Black in fact. Once you've metered your camera for darkness, it's time to add some flash.
For the best results you should have your flash stand and subject as far away from a background/wall as the space you're in allows.
Set your speedlight(s) firstly to low power and fire some shots - they may still be on the dark side, but you've got a good starting point from which you can then work with your subject and increase flash power as necessary until you get the desired result.
Here's some of my shots - don't forget, this small room was flooded with daylight, there wasn't much separation between the subject and wall either, but enough to provide a virtually non-existent background to remove in post. Dark and a little moody was what I was looking for, which I think I pulled off fine.
Kit used for these shots: Canon 7D, Canon 70-200 F2.8 IS II, Canon 580EX, light stand and 60x40 softbox.


I have two shoots coming up this week that will present me with a couple of interesting challenges!
Firstly, I've been given the honour of being invited to shoot a product launch. Not just any product launch however. This is a car launch, from a major manufacturer, with a glitzy invitation-only party!
Then on Saturday night I'm shooting a rock concert. Yeah ok, so I know the band, but as i'm trying to break in to music photography, every little leg-up is going to help!
Both events will be major portfolio builders for me, and could lead to further work.
Check back next week to see how things went!!!

Poor Sinbad, eh?
May 21st this year saw the return of Düsseldorf's annual Japan Day. If you're ever needing to see some wierd and wonderful people - then this is the place!
Thousands of people descended on the banks of the Rhein to enjoy a day of cultural performances, cultural cuisine, and as far as I could make out - dressing as wildly as possible!
Now, I'm not too aux fait with these things - but there are two words I heard a lot - Anime, which I think I know what that is, and Cosplay, which apparently means Costume-Play, or, dressing as wildly as possible!

I don't like the way this fella was looking at me!
Another thing I saw loads of, was Tea. Loads of it! There were pop-up stalls everywhere selling all kinds of tea, including something called 'Jelly Tea'. Now this stuff produced massive queues everywhere it was being sold - and I still haven't got the first idea what it is! It was popular anyway!

The queue for the food stand was the worst.
One of the most interesting aspects of the day for me was seeing other photograpers in action. There were lots of them!
With people photography not being an area I get too busy with (buildings and aircraft are my thing, but I hope to get in to live music), it was really interesting to see these other guys in action; how they interacted with people when asking for photos, taking photos and after they've shot them.
One of the biggest tips I took from this experience was business cards. Now this is probably a great tip for everyone shooting in these type of scenarios.
Each time a pro stopped someone and took there picture, they gave them a business card. What a cool idea! That person can now check out your site, twitter, flickr or whatever and find their picture! Maybe even buy a print - or even hire you! Top tip right there!
Until nextime!
Apeman

